
Category Archives: Star Wars DIY
STAR WARS HEADBOARD WITH GLOWING STARS
Via Instructables.com:
I was inspired to create this double size head board because my son is so stuck on Star Wars . He can’t get enough of it. The LED stars are perfect for a child that needs a little extra light at bed time. It takes them away to another world . Who wouldn’t love to fall asleep under the stars ?
The project was created with a simple coloring book. If you can color in a color book, you can definitely accomplish this project with great results !
Tools Needed
Jig Saw
Router with a 3/8 ” round over bit
Screwdriver
Drill with a bit size of ( 5/16″ and 7/32″ and 9/32″)
Chop saw or skill saw
Vice grips
Projector
3 Paintbrushes Large ,Medium and Small
Supplies
4’x 8’sheet cut down to 2.3′ xi 5′ 3/4″ MDF sheet
1″x4″ 8 foot board
12 1 1/4 ” wood screws
Four each of (1/4″ carriage bolts )(1/4″ nuts)(1/4″ Flat washers)
Countersink
1 string of 35 or less LED Christmas lights
2 Black Sharpe fine tip pens
Clear Varnish spray or liquid
Acrylic Paint Colors
1 Cobalt Blue
2 Light grey
3 Dark Grey
4 White
5 Black
6 Silver
7 Dark Metallic Gold
8 Yellow Metallic Gold
9 light brown
10 Dark Brown
11 Antique white (off white for skin tone)
12 Georgia Clay (Red/orange mix)
13 Plum or purple wine
14medium yellow
15 light green
16 dark green
Click below to see the full article.

ROGUE ONE DEATH STAR PLANS NOTEBOOK CRAFT
Via Starwars.com:
THE FATE OF THE REBELLION IS IN YOUR HANDS…AND READY TO HOLD YOUR MOST VITAL INFORMATION.
The Death Star plans are not in the main computer — they’re in your backpack!
The Rebellion scored its first major victory by getting their hands on the Death Star plans, thanks to the efforts of the Rogue One crew. Now you can get your own copy of the valuable datatape by turning a composition notebook into your very own set of plans.
What You Need
Composition notebook
Two sheets of black cardstock paper
One sheet of silver scrapbook paper
One large circle template, such as a CD
One small circle template, approximately 2.5” in diameter
5/8” paper hole punch
Single-sided self seal laminating sheets
Scissors
Craft knife
Glue
Pencil
Click below to see the full article.

Star Wars Dining Table
Via Instructables.com:
This project stemmed from my sister’s dire need for a dining room table, my desire to push my creative boundaries, and mine and my sister’s love for Star Wars. As a college student living in an apartment, my sister had little money for furniture, and it just so happened that I needed a new project for my high school shop class.
Features & the basic rundown:
The top is a representation of the death star (hopefully obvious, otherwise I didn’t do a very good job!), complete with 9 LEDs arranged to look like the 9 points of the super laser. The aprons of the table are finished in a star field with the Star Wars logo in the center. The legs are representations of light sabers and are braced in the middle by an X shaped cross section that was supposed to be a representation of a walkway from the films( a la Death Star in A New Hope or the carbon freezing chamber from Empire Strikes Back), which features action figures of Luke and Darth Vader arranged to appear as though they are dueling.
Unfortunately, I neglected to document any of this project as it was being built, and as a result, this Instructable is much less of a “step by step” and more of a showcase of my work. However, I will do my best to walk through the process of the build, showing each section and trying my best to explain how I did it. I will also offer suggestions for alternative construction methods that would improve the quality of the work or accommodate different situations(denoted by an asterisk [*] and bold text), and I will provide links to the Sketchup model, templates, and other resources that I used throughout the build.
With all that being said, let’s walk through it!
Click below to see the instructions.

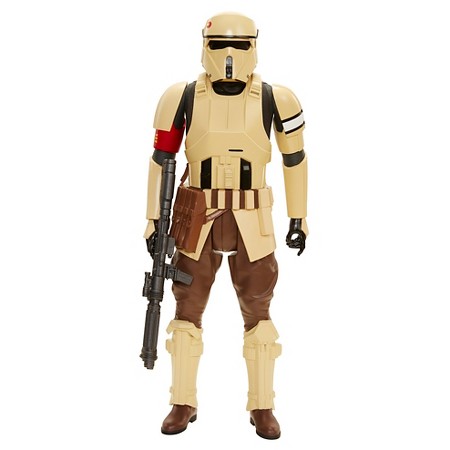
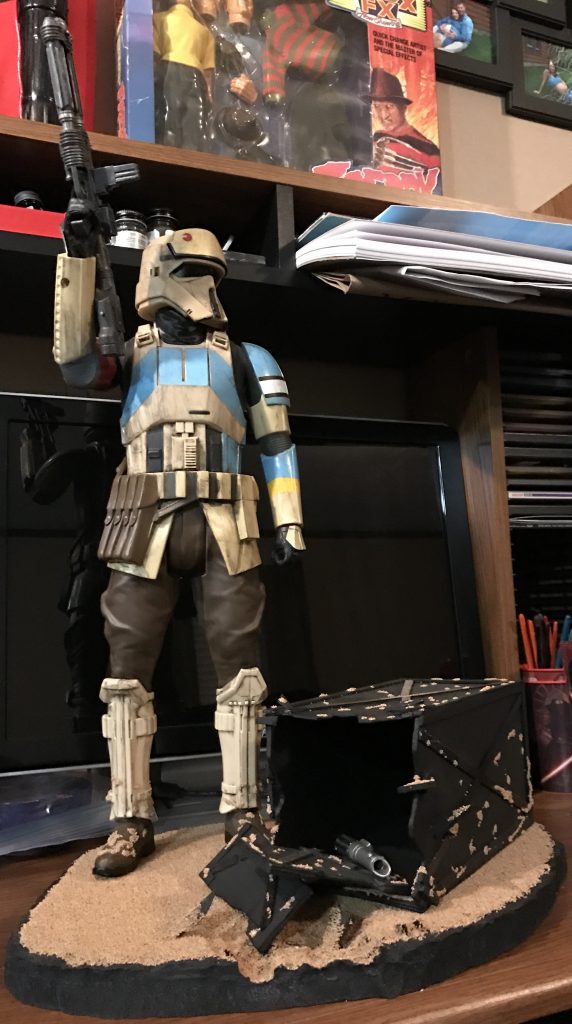
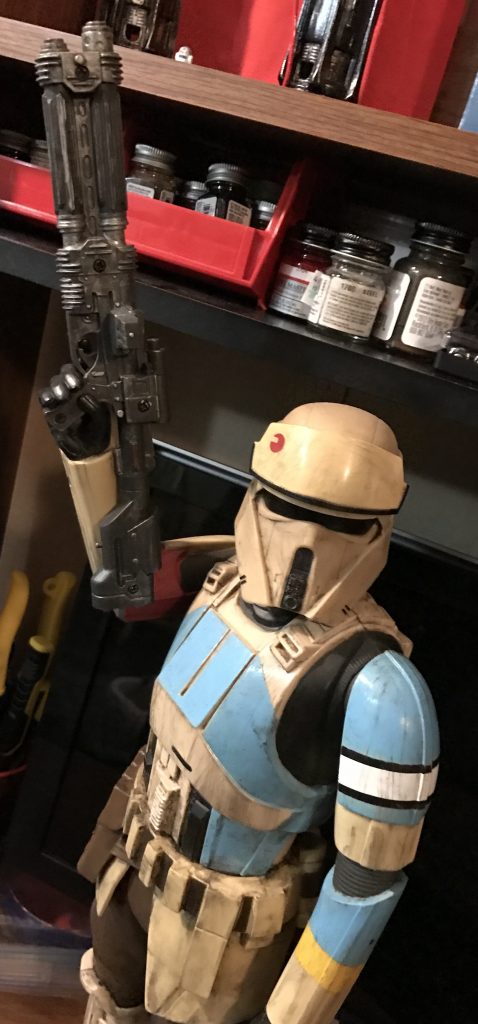
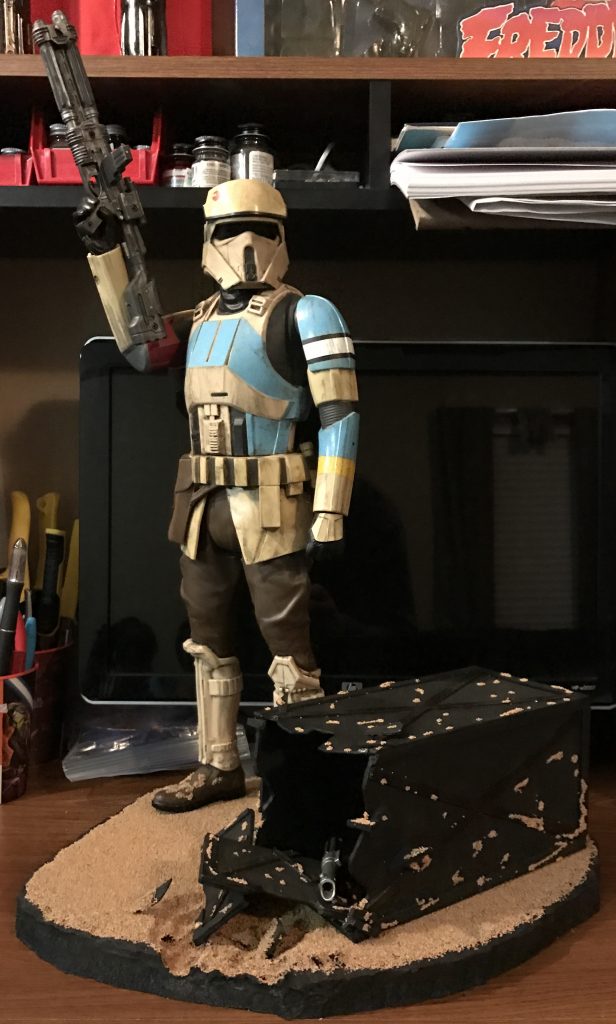
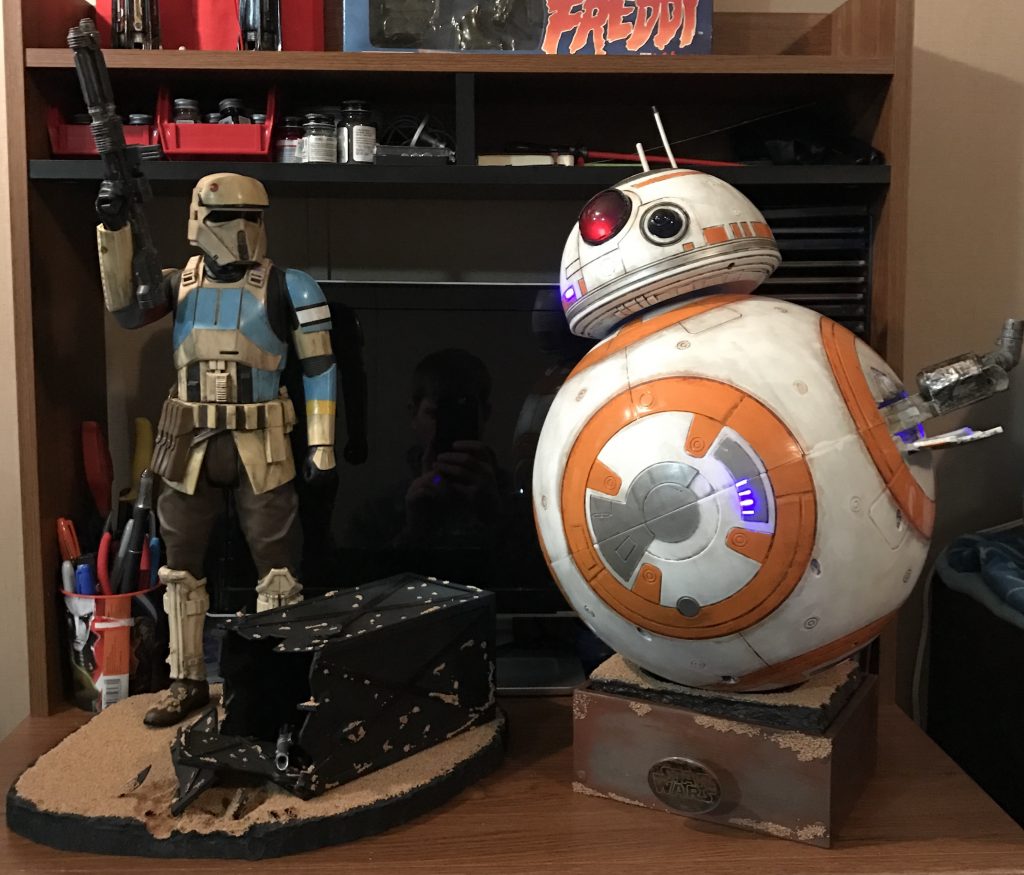
Customized Scarif Shoretrooper
Brett Bartniks shares his latest custom collectible. Thanks for sharing this with us!
I just finished my latest Star Wars project. It is a Jakks Pacific 18″ Scarif Shoretrooper. I repositioned the right arm so he was holding the blaster in the air. I repainted him to look like a Scarif Shoretrooper Squad Leader instead of how he came as the regular Scarif Shoretrooper. I wanted to give him some color and it came out looking great. I also repainted the blaster and then made a custom base for him. It is a beach style base with a cargo box I made. I then made it look like it exploded in the front. I wanted to make it look like he was in a harsh battle just like in Rogue One. I also put A Lightsaber in the cargo box like it was precious cargo and they were trying to get it to Darth Vader. Haha.
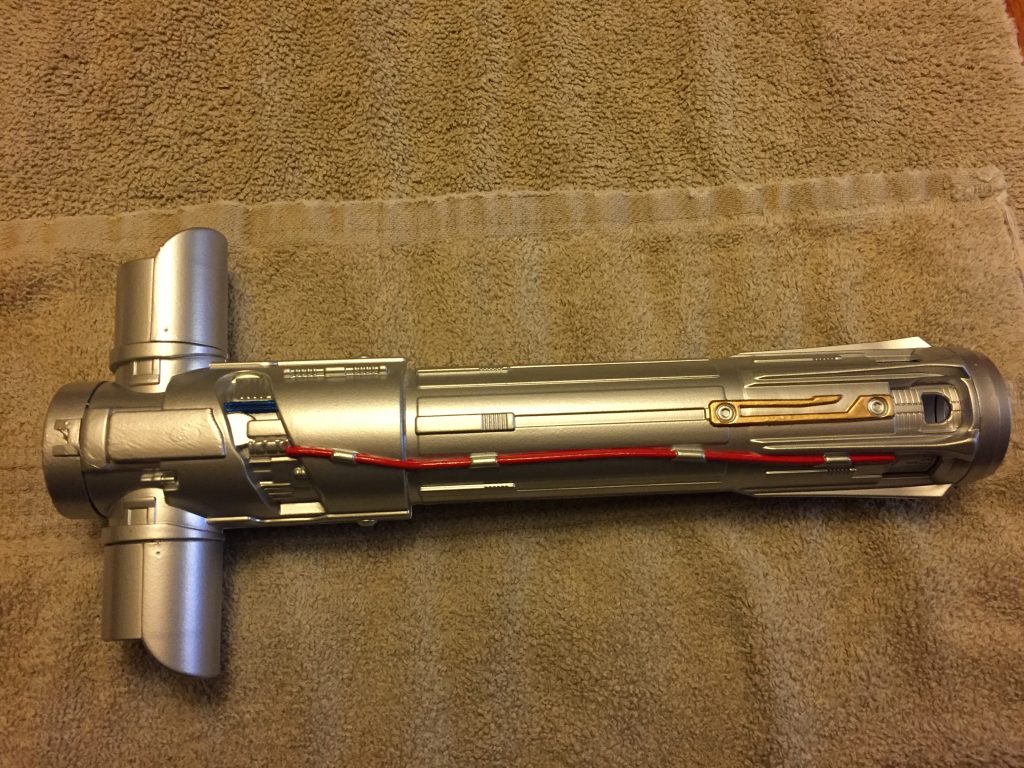
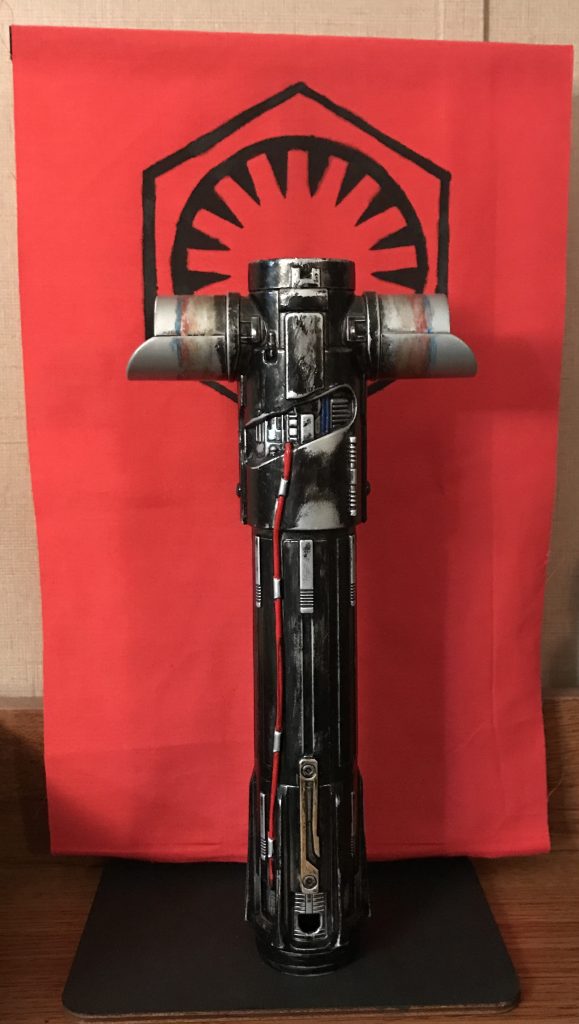
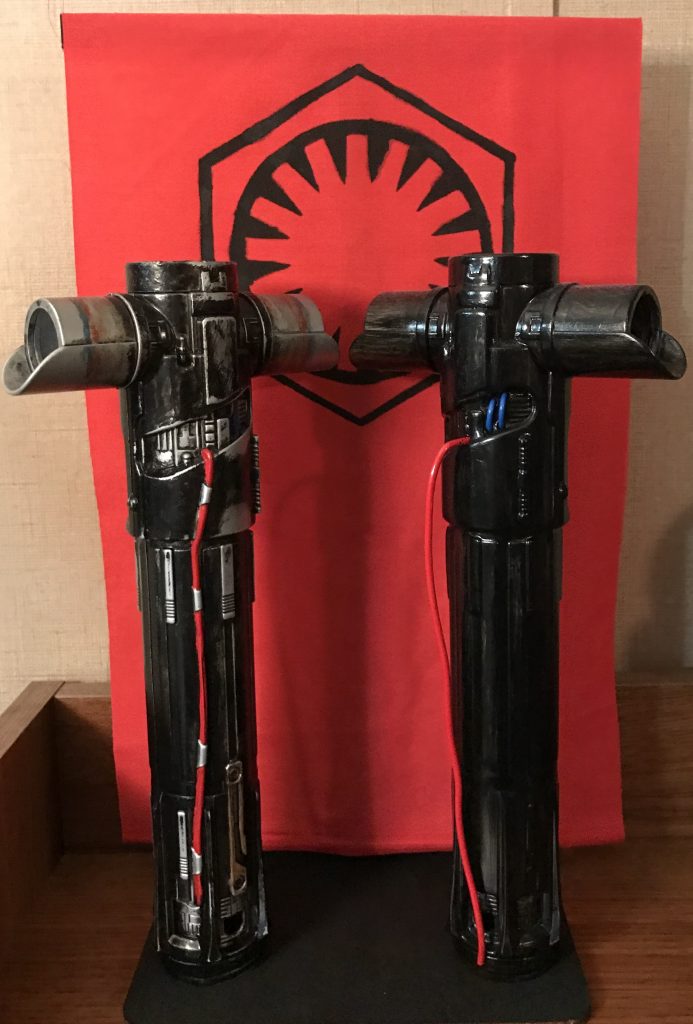
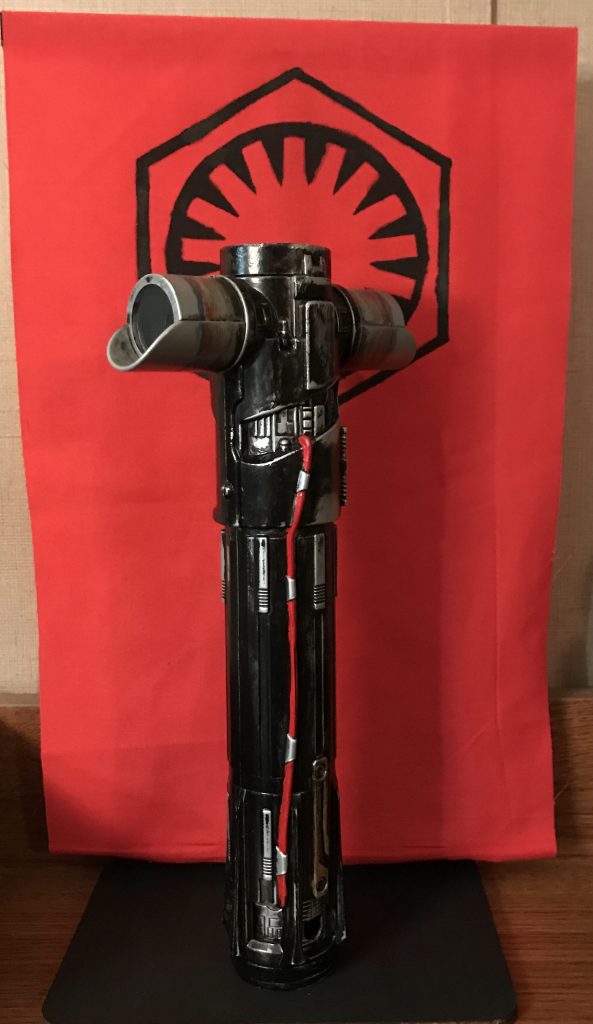
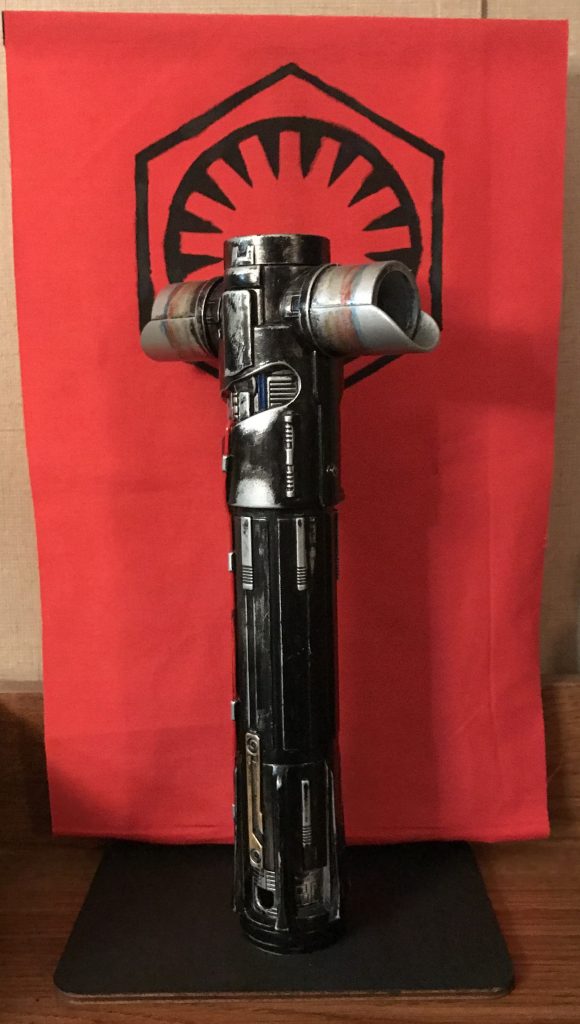
Custom Kylo Ren’s Lightsaber Hilt
Brett Bartniks shares his latest custom collectible. Thanks for sharing this with us!
This is a Bladebuilders Kylo Ren plastic extendible lightsaber. It’s one of those cheap plastic lightsabers, but it’s has potential to look good after painting it. I bought two of them and I am doing each one different. The first one is more of just painting it. So what I did was took out the plastic red lightsaber pieces. After that I primed the hilt with a grey rust-oleum spray paint. Let that dry for a few hours and then used a metallic aluminum spray paint. This takes a while to fully dry and cure so I left it for about 24 hours. Then it’s time to hand paint and give it that old look. So I used my old favorite product, Kiwi shoe polish. It’s needs about three or four coats of this. Then once you get that blackish weathered look that you desire, you take a dish sponge and use the rough part to take off some of that shoe polish. With this you will need a cup of warm water to dip the sponge in. This will help take of some shoe polish off in the areas that are supposed to look as if metal is being exposed. Now it’s time to paint the the wires red and blue, then paint the clip gold. Last but not least you can paint the side parts of the hilt to look like its was hot from the unstable blades. All you need to do is dry brush gold, red and blue. Try to blend them together the best you can. That is it for the basic one. The next one I am doing is not finished yet. It is the same steps except I decided to sand of the wires they had on it and take some real red and blue wire from the hardware store to put on for a more realistic look. The sanding takes a lot of elbow grease and time. So be patient. There are a couple pieces you’ll need to attach to the red wire. I used silver flashing. You can use sheet metal if you want. It’s just a few pieces to wrap around the red wire. I also sanded the hasbro logos off this one so it doesn’t have any of the logos on it. I will also attempt to put some red led lights in the hilt hooked up to a battery pack. Last but not least I made a base for it. I used a cheap piece of wood from Michaels and painted it black. I bought some red fabric from Walmart to make a back drop with a hand painted First Order logo on it. I used balsa wood to hold the cloth up. I made a T and stapled the cloth to the balsa wood. That’s my latest custom collectible. If you have any questions and want to attempt this, feel free to email me at Btbartnik@gmail.com. I hope everyone enjoys. I also have a Jakks Pacific Kylo Ren 20″ figure and a Jakks Pacific Scarif Shoretrooper 18″ figure I am customizing. They are almost done so expect those soon!
![]()
![]()
DIY VALENTINES
Via Starwars.com:
IS THERE SOMEONE YOU LIKE AS MUCH AS MAZ LIKES THAT WOOKIEE? TELL THEM WITH THESE EASY CRAFTS!
“Where’s my boyfriend?” – Maz Kanata, The Force Awakens
Star Wars is known for its epic romances, whether it’s a princess and a scoundrel or a queen and her Knight. Will the budding love between a wise pirate and a Wookiee hero become the next great Star Wars love story?
Show your valentine this year how much you like them by handcrafting a Chewbacca pencil topper gift and Maz Kanata valentine card. Make one or both of these one-of-a-kind valentines to give everyone in your class or to declare your affections to someone truly out-of-this-world.
Click below to see the full article.

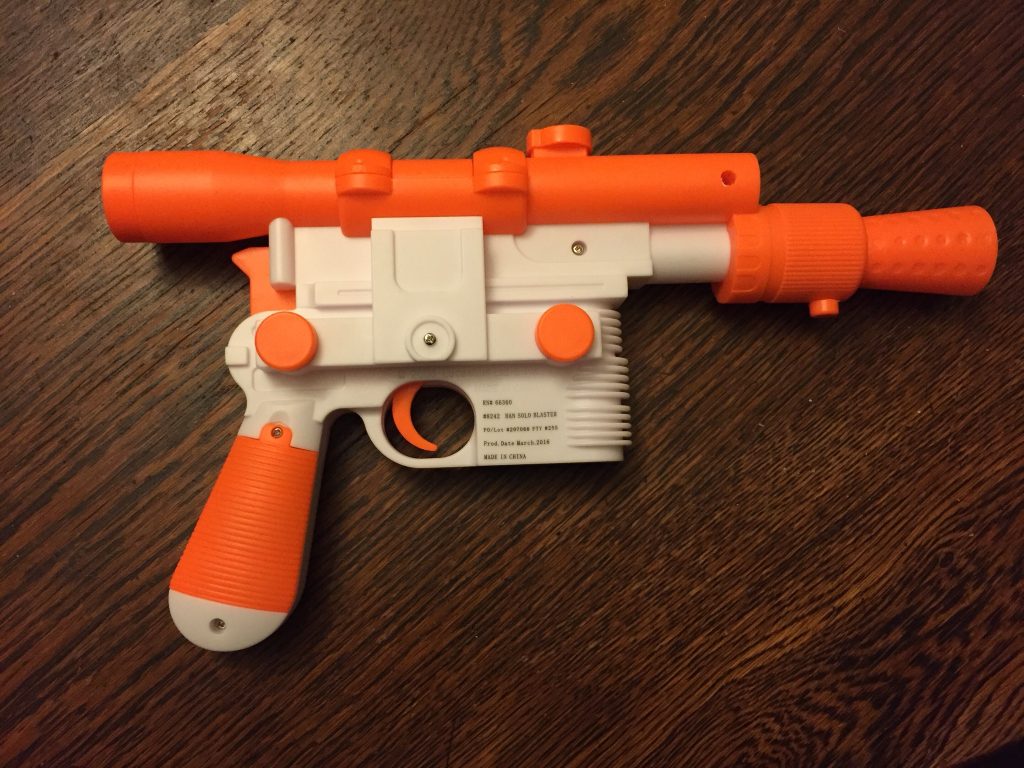
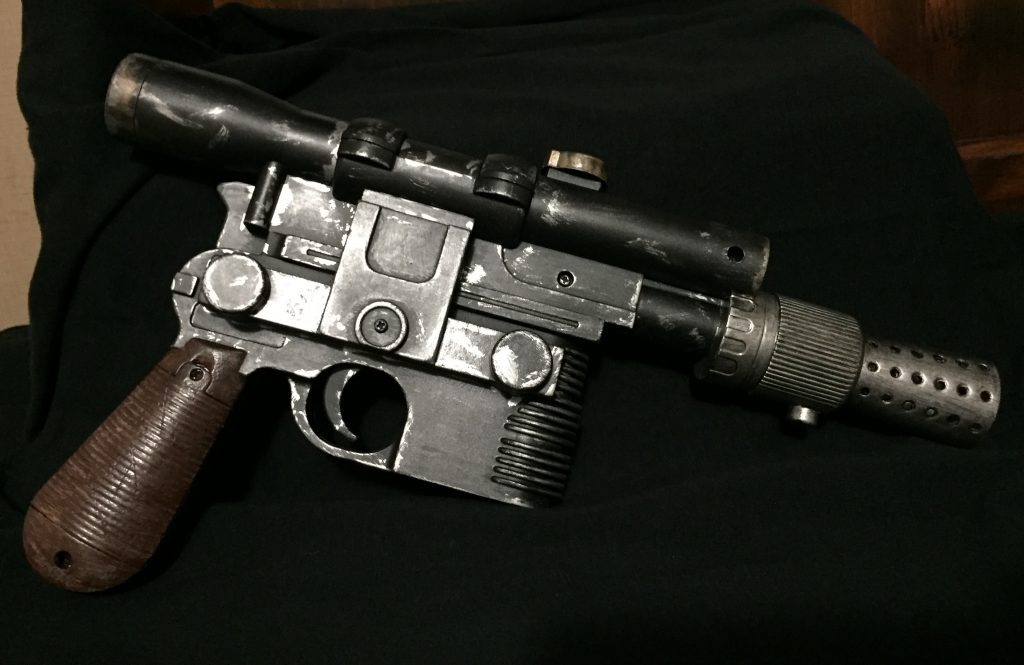
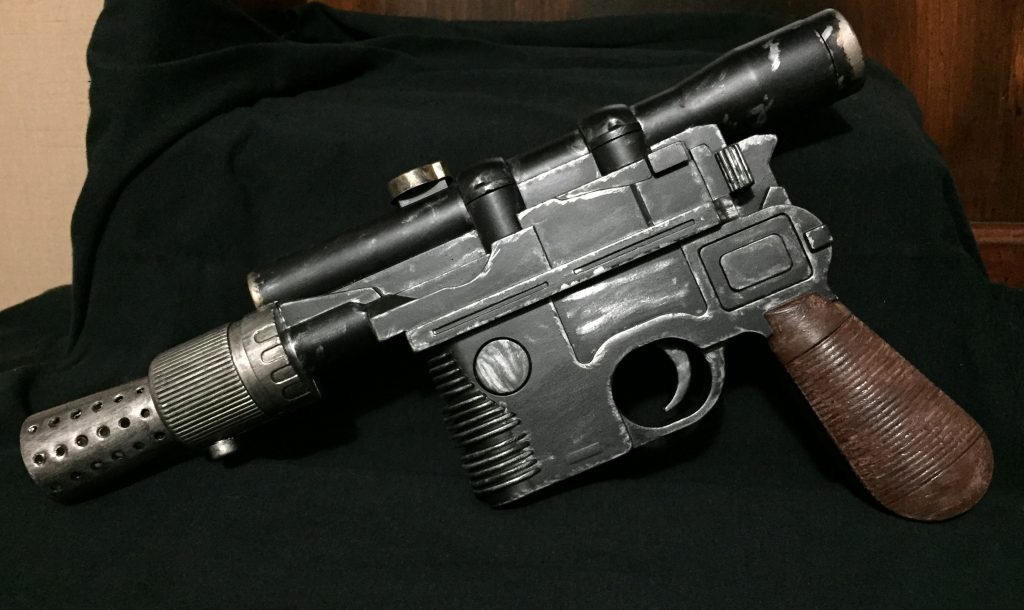
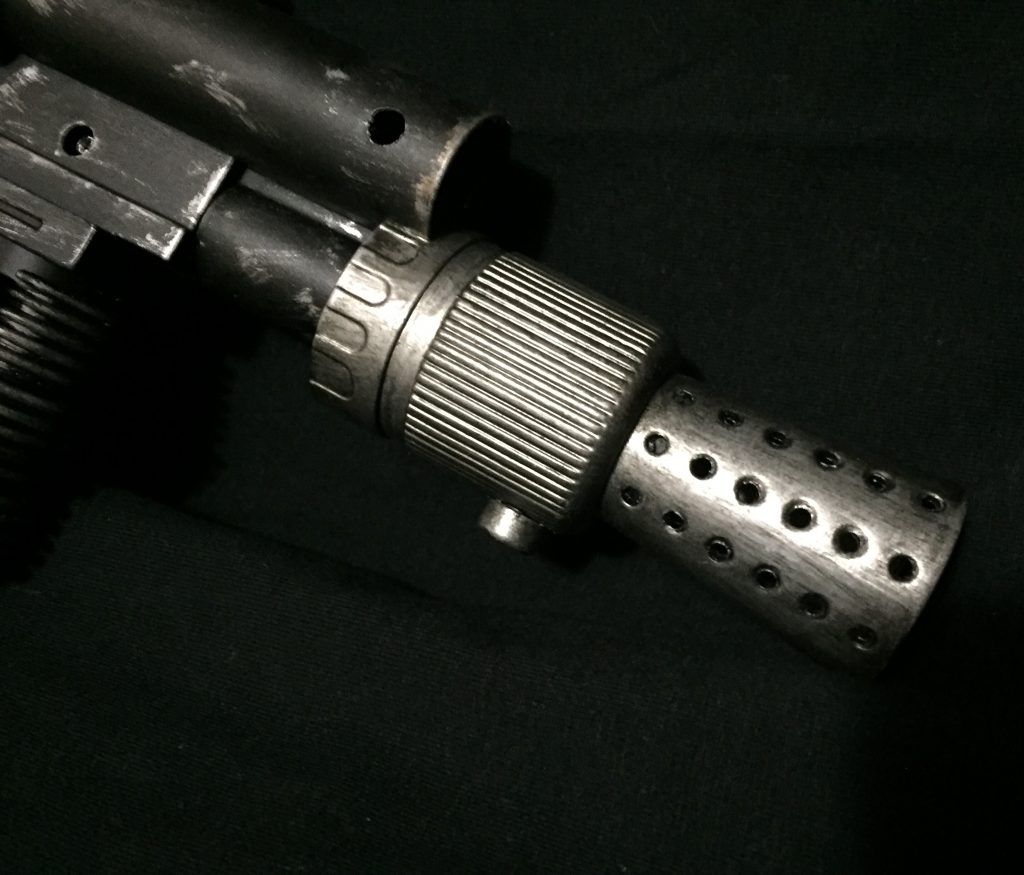
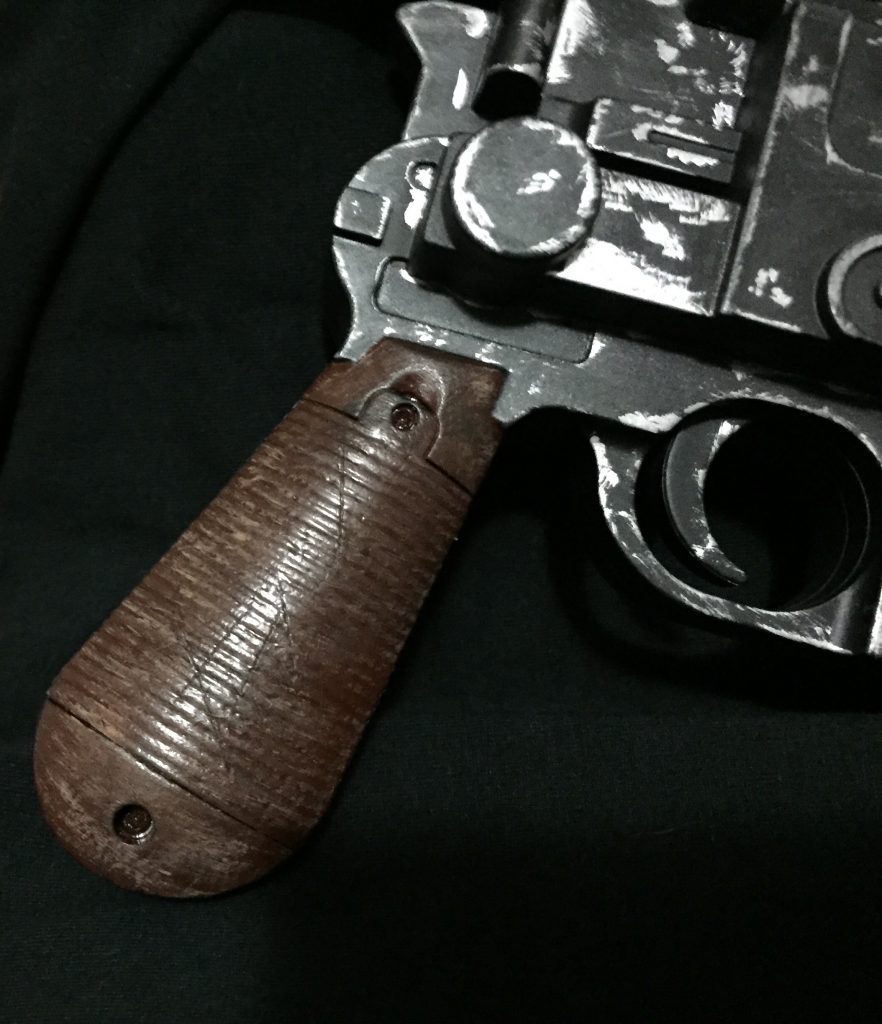
Customized Rubies Han Solo DL-44 Blaster
Brett Bartniks shares his latest custom collectible. Thanks for sharing this with us!
This I had purchased from party city. It had a lot of potential to look great. First I sanded the trademark and logos off it, then took the front piece out on the business end of the blaster. I then drilled little holes in the barrel of the blaster and scored the handle/grip with a razor. It’s time to paint now and this one was fairly easy. I used a spray paint primer then spray painted it black. Now its time for hand paint. I painted the barrel silver/chrome. Then dry brushed the rest of the gun to make it look as if metal was being exposed. I also dry brushed a little gold/rust in a couple areas of the scope. Now it was time to paint the handle/grip of the blaster to make it look like real wood. Last it was just going over the blaster with a black wash or black shoe polish to give it that weathered look. Hope you enjoy!
Star Wars R2D2 Cupcakes
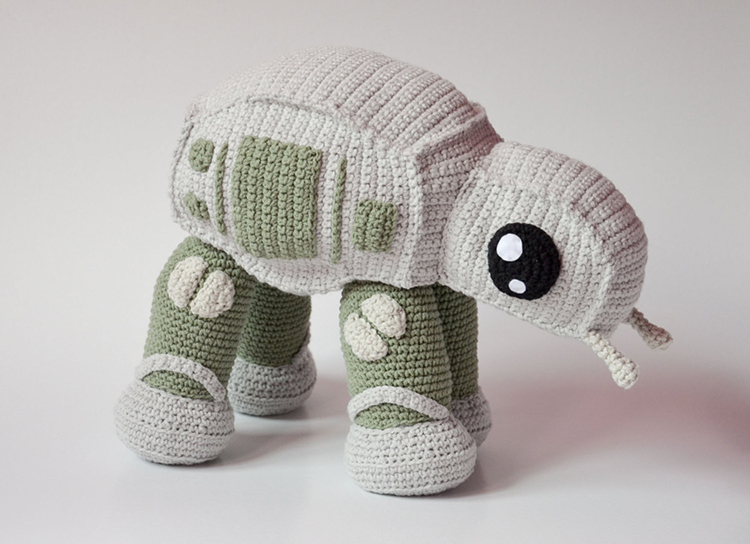
Star Wars AT-AT Walker Crochet Pattern
Via Laughingsquid.com:
Lodz, Poland artist Kamila Krawczyk (a.k.a. “Krawka“) has created an adorable Star Wars themed AT-AT walker crochet pattern to help “medium advanced crocheters” make their very own All Terrain Armored Transport figure. The pattern is available to purchase from her Krawka Etsy store.
Crochet walker, when finished, is 26 cm tall (10.2 inches), 28 cm long (11 inches). He is quite large and therefore we will have a lot of parts to make, please be patient and don’t give up because the end result is totally worth it… oh (I almost forgot) May the force be with you!!
Click below to see the full article.
3D Printed Star Wars Rogue One Shore Trooper Helmet
DIY ROGUE ONE COSTUMES
Via Starwars.com:
WANT THE PERFECT OUTFIT FOR OPENING NIGHT? LEARN TO MAKE YOUR OWN ROGUE ONE COSTUMES!
Rogue One: A Star Wars Story hits theaters December 16 (in the US) and like any good Rebel, you’re prepped and ready for this big moment — you’ve pre-ordered your movie tickets and set up the meeting time with your friends — now, there’s only one thing left to do…cosplay! Dressing up to watch the film is a fun way to celebrate this exciting Star Wars event. So if you’re looking for a DIY costume to get you into the Rogue One spirit, here are a few ideas!
CASSIAN ANDOR
Battle the Empire, and the winter weather, in this Captain Cassian Andor ensemble! Parkas are popular this time of year so it should be easy to complete your costuming mission. Keep in mind that if your hooded jacket doesn’t have a fur trim, you can add it yourself! Simply hand-sew a strip of brown faux fur (available at most fabric stores) onto the hood of your parka. This jacket will also come in handy when you visit Hoth, if you’re cosplaying as Han Solo in The Empire Strikes Back!
Click below to read the full article.

AT-ATrinket – a Star Wars Trinket Box
Via Instructables.com:
This project was born out of admiration for the Star Wars universe, and vehicles created for the movies. Imperial walkers are amazing machines, and the AT-AT the main example of this class of vehicles. The idea was to take advantage of the same design to create a trinket box produced in 3mm MDF, which once assembled has dimensions of 19.7in x 15.75in x 5.9in.
The piece was drawn on the basis of the drawings available in wookieepedia (detail here), which have been simplified to suit the material and the expected functionality to the piece. One of the goals was to prevent creating something very static, so it was decided that the legs could have their adjusted position, allowing put the AT-AT in different positions, from 12 existing joints.
To build it, you will need:
MDF 3mm;
one router / laser cnc (this model was produced using a router and a bit 1.5mm) ;
8 M3 8mm screws (diameter equivalent to 1/8) and nuts ;
12 M3 12mm and nuts;
glue (cyanoacrylate or specific to wood) ;
acrylic paint, if you are inspired to paint.
Click below to read the full instructions.
